To get Capcut for PC you need to use an emulator.
An emulator will create a Android device on your computer within a program.
Once you have downloaded the emulator, you then need to open the Google Play store and search for Capcut.
Then you need to download and install Capcut, by clicking download in the Play store.
You can then import files in to the emulator in the file section on the main menu and you can then edit these in Capcut.
Table of Contents
1) Download Bluestacks (Android emulator).
What is Bluestacks? It creates a Android device on your computer. You then use your mouse and keyboard as you would use your fingers.
Click here to be taken to the official Bluestacks website.
Once you are there, then click on ‘Download Bluestacks 5’ and installer will download.
2) Install Bluestacks.
Now we need to install Bluestacks, the installer you just downloaded will be in your downloads folder which can be found in the file explorer.
Then run the installer. Bluestacks will start to download more files, as you only downloaded the launcher from the site and not the program itself. The time taken will depend on the speed of your internet.
Once the installer has finished doing the downloads, it will automatically start installing Bluestacks.
This may take a few minutes so be patient.
3) Launch Bluestacks.
After the installer finishes, Bluestacks will automatically launch. If it does not, then click on the magnifying glass in the bottom left of Windows and search ‘Bluestacks’ or a shortcut will for Bluestacks will be on your desktop.
When it first loads you will be taken to the home screen which will look like this:
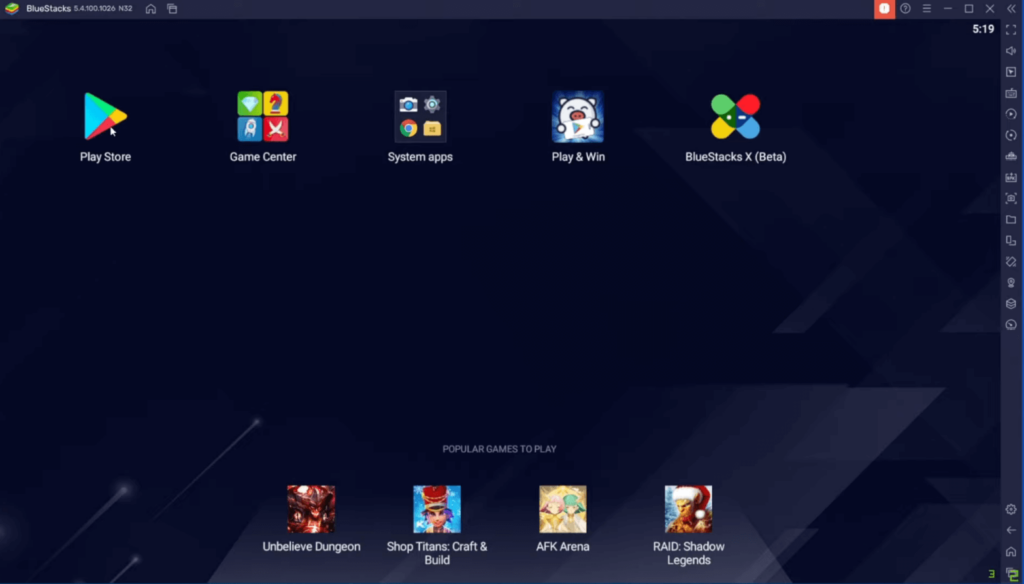
4) Finding Capcut in the Google Play store.
Now open up the Google Play store, you will need to login to your Google account to use the store. Once you have logged in, you will be on the homepage of the Play store. Go to the top and search for ‘Capcut’. It should be the first app to appear in the search results.
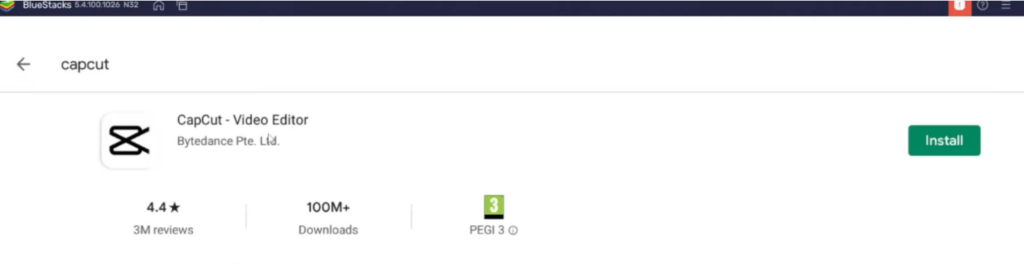
5) Download & Install Capcut from Google Play store
To start downloading it, you need to click ‘Install’ and the the download and install process will begin.
A loading icon will appear showing you the progress.
Once it finishes, the button which was once ‘Install’ will change to ‘Open’ and the Capcut icon will also be on the main menu of Bluestacks as well.
To get back to the home screen, there a home icon the right hand side and on the top bar of Bluestacks.
6) Import files to Bluestacks to use on Capcut.
You need to import files to Bluestacks to use on Capcut but it is a easy process. All you need to do is go to Bluestacks menu and click on ‘System apps’.
Then click on ‘Media manager’. In the bottom left of Media manager, is a button labelled ‘Import from Windows’. You need to click on it and it will open a file explorer.
You then can find the files you want to use like videos, music and pictures.
Click on a file you would like and click ‘Open’ then an importing bar will appear in Bluestacks showing you the progress.

7) Open Capcut.
Now come back to the home screen by clicking on the home icon on the top or left hand side bar.
Click on the Capcut icon on the home screen and it will launch.
8) Create a project in Capcut
Next we can create a new project. Once Capcut has launched, you need to click on ‘New project’ which has a plus icon as well.
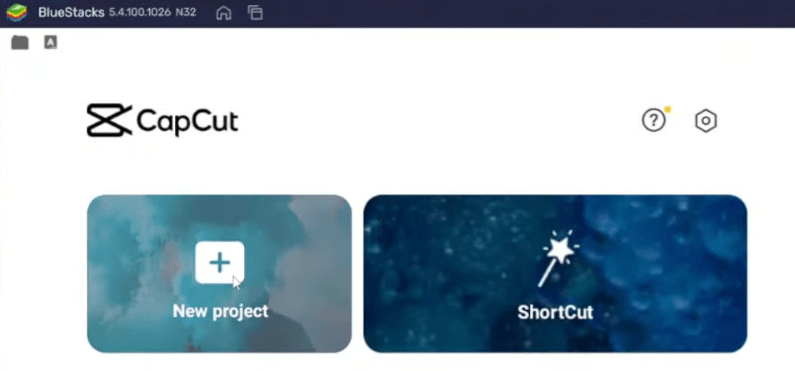
Capcut will then open up a window and you need to choose what files you would like to use in Capcut.
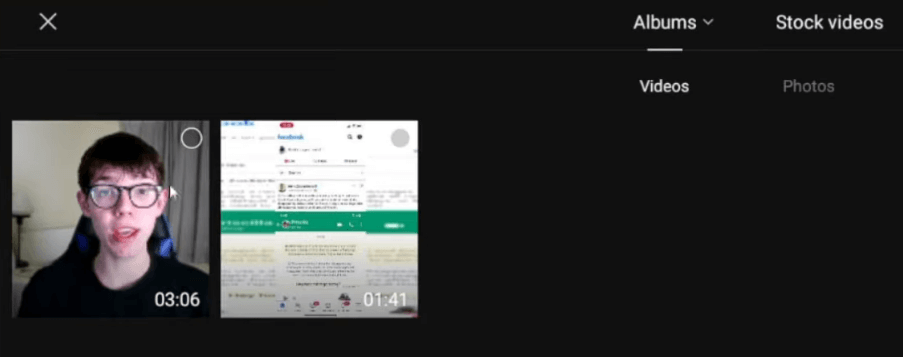
You will now be on the Capcut timeline and you can edit your videos together.
9) Reducing lag in Bluestacks & Capcut
If you are experiencing lag, then here is a easy fix.
In the bottom right of Bluestacks is a settings cog, click on that and you will taken to Bluestacks settings. Then click on ‘Performance’ and here you can change settings such as CPU allocation and RAM as well. Increase these if you’re having performance issues.
Video:
Rob’s Social Media: Linkedin, Twitter, Instagram
Read more about GuideRealm here.